首先,你需要已经装好windows2003。这是前提。
第一步,在VPS control panel里,需要把NIC Card设为 Intel Pro/1000
![]()
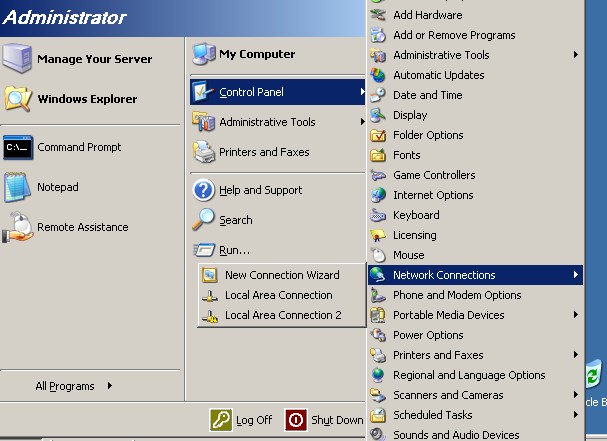
第二部,VNC到windows2003, start->control panel->network connections->local area connection

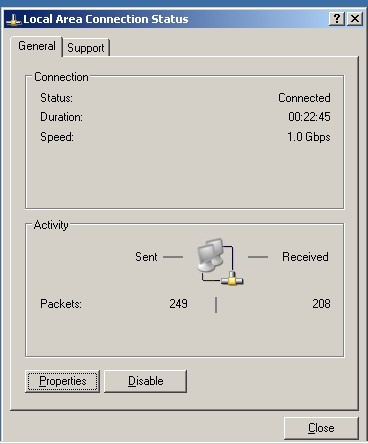
点击左下角的properties

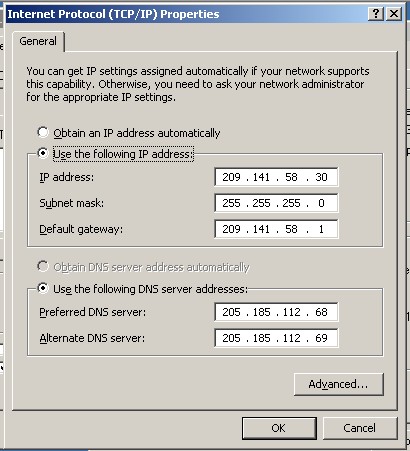
在General里面选Internet Protocol,然后点properties,于是就出现下面的对话框:

这里面填什么呢? 上面的IP address, mask, 和gateway 请参照buyvm给你发来的VPS开通邮件。
比如,我的开通邮件里写了:

至于下面的DNS的设置,buyvm的wiki里面有写。参考如下设置:
DHCP is hit or miss with KVM, if your networking fails to setup automatically please use the following information to configure it manually:
Netmask: 255.255.255.0
Gateway: x.x.x.1 (x.x.x being the first 3 parts of your main IP.)
SJ DNS1: 205.185.112.68
SJ DNS2: 205.185.112.69
NY DNS1: 199.195.255.68
NY DNS2: 199.195.255.69
然后点确定,确定,确定。。。。
于是,你的windows VPS可以上网了!!
转自http://www.hostloc.com/thread-154601-1-1.html